
- Many home owners want to do home improvement projects themselves but often times need knowledge on how to get the job done.
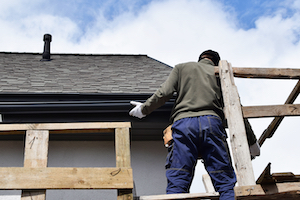
- Gutters can be installed by a homeowner who can do DIY projects but there is a lot to consider to get the job done right.
- It will generally save a person a lot of time and money if they call a professional gutter company to get their gutters installed.
Gutters are essential to allow rain water to run efficiently away from a home or building. If you already have gutters but are having issues with standing water, clogs, leaks and other things that make your guttering system faulty, then you risk damaging the fascia of the building or your home. Here at Rain Guard, we want your business as much as the next gutter installation company, but we also want to help you to the best of our abilities regardless of if we get your business or not. That’s why we have created this 15 step by step guide of how to install gutters by yourself, so let’s get to it.
DIY Gutter Installation
Ok, so you decided to replace your gutters, technically you could just buy some gutters from the hardware store and drill them to the side of your house and call it good. But, not only would you risk ruining your beautiful house or building, your makeshift gutter system probably won’t last you as long. Before we get started, we wanted to note that this project takes a couple of days to complete depending on how much help you have and the amount of product resources you have available. Also note that this project can turn out different for everyone depending on how fancy you want to go, it could cost you a pretty penny.
Needed Tools and Materials:
- Cordless drill
- Crimper
- Duckbill tin snips
- Extension ladder
- Hex head driver
- Offset tin snips
- Pop rivet gun
- 1 1/4″ self-tapping hex head screws
- 1/4″ hex head screws (‘zippers’)
- 1/8-in. medium length rivets
- Downspouts
- Elbows
- Gutter
- Gutter flashing
- Gutter hanging strap
- Gutter sealant
Before You Start
Before you start building, you want to make sure your fascia and soffit don’t have any rotting wood. This is where you will be installing your new gutters, and you don’t want to install them on decaying wood, so if you find rot you’re gonna have to remove and replace that. Also if you have any extra trim pieces hanging on to your fascia, you’re going to need to remove that as well and replace it with a long strip of wood so your gutters have a flat plane to be installed on. (don’t forget to paint it before putting the gutters on!)
After inspecting the house and seeing that it’s ready to have some lovely gutters put on, we can start measuring the length for the gutters and sketch out where you are going to put your downspouts. Good rule for downspouts is to put them in places where water can be directed away from the house and avoid electric meters, hose bibs, or sidewalks. Once you have that figured out, start at step 1 below.
Steps:
1. Cut the Gutters
Before going up to your roof, let’s cut and join the gutter parts on ground level. Using the Duckbill Tin Snips you can cut your gutter to length.
2. Make a Notch
Using the Duckbill Tin Snips, again, you are going to cut a four inch long notch at either end of your gutter on the front lip.
3. Join the Sections
On your corner piece, lay a strip of gutter sealant on the edge you are currently joining. Hook the front lip where you made your notch under the corner piece’s front lip and snap the two pieces together.
4. Rivet the Sections
Where the two pieces overlap, you are going to drill six ⅛ inch holes for the rivets. Two on each side of your gutter.
5. Create a Seam
On the inside of the gutter joint, you are going to use caulk to create a seam between the two joined pieces and also a little dab on each rivet.
*Repeat steps 1-5 until all your pieces have been joined.*
6. The Downspout Outlet
Trace where you want your downspout to be using the downspout outlet tube (trace using the inside of the tube) and chisel out a hole so you can use the offset tin snips to cut out the hole. Cut just outside the line you drew.
7. Seal and Rivet
Put your outlet tube in the hole then pre drill four holes for your rivets. Remove the outlet, run a seam of gutter sealant on the rim of the hole and press the outlet back in its spot. Now install the rivets.
8. Create a Slight Slope
When installing your gutters make sure you have a slight slope down towards your drops, otherwise you will have standing water in your gutter….kind of defeating the purpose of installing them.
9. Install the Gutter
Once you measure where you are going to install your gutters, you can now drive 1 ¼ inch stainless steel hex head sheet metal screws through the back of the gutter into the fascia. You only need a screw every two feet or so.
10. Slide the Gutter Flashing
Slide the Gutter Flashing under the shingles and secure with 1 inch roofing nails.
11. Screw in Hanging Straps
To make sure your gutter is supported, you can screw a hidden hanger every two feet or so.
12. Screw Elbows To Your Downspout
When assembling your downspout make sure the crimped edges are facing down to prevent water leaking. You’re going to use sheet metal screws to screw the elbows to the downspout outlet. Now put another elbow against the wall and measure the length between each edge, allowing a 1 ½ inch seam for both sides. You can then cut your downspout tubing using a 32-tooth hacksaw.
13. Crimp the End
Crimp one end of the downspout using a sheet metal crimper. You can then attach the elbows to your tubing.
14. Fasten Brackets
For the long tube that goes all the way down the wall, you are going to want to fasten some brackets to the wall to support the Downspout.
15. Attach the Downspout
Finish your guttering system by attaching the long tube to the elbow and drive screws through the tube and the bracket to fasten.
Trust the Pros: Rain Guard
So there you have it. A 15 DIY step by step guide for you to be able to install your very own guttering system. Yeah, yeah, we know it’s a lot and seems a bit complicated– but we never said what we do is easy! Here at Rain Guard we can take the stress out of installing your gutters by yourself because we are pros.
Our services go beyond providing seamless gutters. We also specialize in underground drainage systems, commercial gutters, leaf filters, gutter guards, tiger stripe removal, and more. In order to keep your guttering system feeling like brand new gutters, consider opting for our gutter maintenance services. We look forward to helping you achieve the guttering system you want.